Push your Django Apps to Heroku
Mohsin Mahmood edited this page on May 22, 2019
Heroku is a cloud application platform, it is a PaaS (Platform-as-a-service) service. It allows you to deploy your web application from your localhost to cloud so that your application could be commercialized and could get production ready.
1. Preparing your application
Copy the Project folder separately for deployment.
2. Initialize Git Repositor
- Install Git
- Press WIN+R
- Type
cmdand click OK - Navigate to project folder
- Make sure your are in the directory where the
manage.pyexists
1 2 3 4 | |
3. Add Files To Git
1 2 3 | |
4. Activate Virtual Environment
Activating virtual environment.
1 2 3 4 | |
Run these command to activate the environment.
1 2 | |
1 | |
- Install all the required libraries that your project required via
pipcommand. - Plus install the following dependencies in your virtual environment.
1 2 3 | |
django-heroku: official package by Heroku which made our deployment simple.
5 Modify Setting.py file
Now, In app/settings.py file add below content
1 2 3 4 | |
At the end of the setting.py file add this line also.
1 | |
Now we need to hide the SECRET_KEY from the deployment code.
For this, add this line of code before
SECRET_KEY = "Djfhslkdfsjf*(skdf0suerjwehksjdf"
1 | |
Move your actual SECRET_KEY to the .env file that we are going to create.
6. Create a file .env
Now, run a command in your terminal.It will create a file .env in your app directory.
1 | |
Add your
SECRET_KEYfrom setting.py to.envfile.
7. Adding more to setting.py
Do this in your app/settings.py.
1 2 3 4 | |
Make sure you do not have this command in setting.py file already. If so remain it as it is. For more info
1 | |
8. Static file serving for web apps
To serve static assets I use the WhiteNoise project. To install: pip install whitenoise
For more info
Do this in your app/settings.py file.
1 2 3 4 5 6 | |
1 | |
9. Create a Procfile
Open the command prompt in your directory and type this command.
Make sure you type
Procfilecorrectly (casesensitve)
1 | |
Open the Procfile and add this line in the file.
1 | |
10. Run Django Server
Type this command in the command promt to open the django server.
1 | |
run this command too.
1 | |
If your site is working correctly then move to next step.
11. Creating a file requirements.txt
This command create a file requiremets.txt and add all the dependencies that your application needed while pushing to heroku.
1 | |
add dependency requests==2.21.0 to the requirements.txt file.
12. Heroku Sign up
Start a heroku account — Sign up.
Install Heroku Toolbelt commands
After installing heroku toolbelt your terminal will support all the heroku commands.Open your terminal as administrator and run this code
1 | |
login to your heroku account via terminal
Enter your Heroku credentials.
1 2 3 | |
Inside the project root, create a Heroku App:
1 | |
Adding a Heroku app to Git remote
1 | |
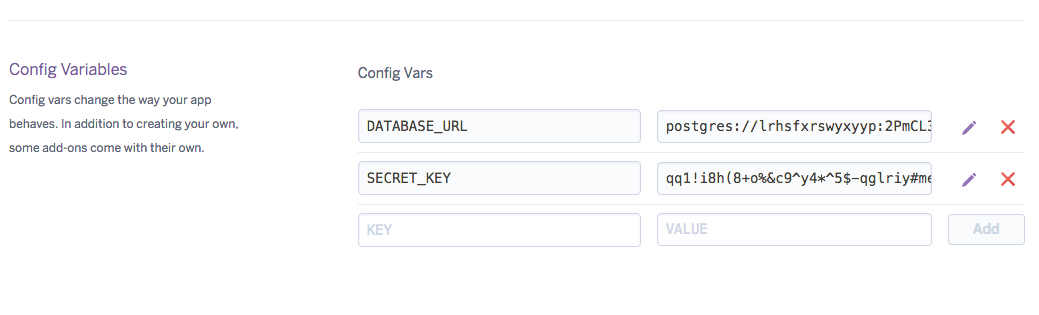
Open the heroku dashboard and navigate to your new created app.
In setting tab, add the config vars: SECRET_KEY
13. Update Git repository
1 2 3 | |
14. Finally Push to Heroku
1 | |